HOW-TO, Techniques, & Best Practices Channel
| 13 Features to Look for in a Camera By Jon Firestone posted Mar 21, 2008, 15:56 |
Click here to get a copy of the November 2007 Edition, so you can read and enjoy all of the excellent articles inside. Check out this article in the November 2007 print edition of StudentFilmmakers magazine, page 6.

Jon Firestone developed and taught the 3D graphics program at the Colorado Film School and works as a freelance director and cinematographer when he is not pursuing his other passion as a Visual FX supervisor and Animator.
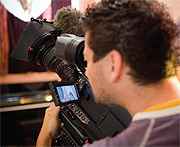
HD Camera Essentials
There are a lot of cameras available today, but the vast majority of them don’t fulfill the requirements I have as a filmmaker. Of course, price is usually the primary factor, and an ideal camera can be had for the right price. But for most of us with limited resources, when we are looking to buy a camera, the ideal camera that meets all of our wishes is well out of our price range. So from there, it comes down to which compromises to make. Ideally, a camera would have the following features:
1. High Definition or beyond
2. 3 Chip (however, new CMOS technology is changing this trend)
3. Professional Audio Inputs and Phantom Power
4. ND filters
5. Detachable lens
6. Manual controls
7. Easy access to manual controls
8. 24P mode
9. Larger image sensor size
10. Higher resolution image sensor
11. Assignable buttons
12. Zebra Stripes (adjustable level preferred)
13. Underscan capability
 High definition to me is a no-brainer. The extra resolution goes a long way in making the image look better, and HD footage can even look better than native standard definition when down-converted. I have a hard time suggesting that anyone beginner or entry-level look at anything less than high definition cameras. The primary reason being that the costs are so similar, and a high definition camera gives you more room to grow into. It’s a little like buying a pair of shoes a half size too big, knowing you’ll grow into them over the next year or so. It also opens upon other opportunities for which the camera can be used.
In the past, in order to get a high quality camera, you needed to go with a 3 chip camera. Instead of using a single chip with either a red, green or blue filter over every pixel, splitting up the colors, 3 chip cameras use a prism with dichroic filters to split the light into 3 images – one green, one blue and one red – and has an image sensor for each color. Recently, this trend is changing though, especially with the advent of super high resolution chips on DSLR still cameras, which use a single very high resolution chip. Even high-end digital cinema cameras like the Red One and the Panavision Genesis have only one image sensor. But for the most part, it is generally a sign of a better camera if it has 3 chips instead of one.
The professional audio inputs on the higher end cameras are one of the most desirable differences between the lower and higher end cameras. Since a lot of these projects will be recording audio to camera, because of lack of time-code sync capability on most of these cameras, and a simpler workflow, it’s nice to have better built-in audio capabilities. Usually, if a camera has XLR jacks, it will also have Phantom power, which will power condenser mics like the shotgun mics used on most sets.
Higher end cameras usually have built-in ND filter wheels, which are great when shooting outdoors in daylight or under intense light. There are lots of ways to decrease the brightness of the image, including increasing shutter speed, adding Neutral Density Filters and reducing the aperture by closing down the iris. Both increasing the shutter speed and changing the aperture will have other effects on the image though. Closing the iris increases the depth of field. This can be handy at times, but most of these new cameras have small image sensors, giving them a lot of depth of field. One of the few ways to get a select focus on a subject with these cameras is to shoot with the lens wide open. In this situation, irising down is not an option. Increasing the shutter speed will also cut out light, but will decrease motion blur, and can cause other undesirable effects, such as flickering from some lights when not in sync with their cycle rate. ND’s are handy in the fact that they cut down light without any of the other effects on the image. Having an ND filter wheel built into the cameras makes using ND’s quick and easy.
Unfortunately, most affordable cameras do not have detachable lenses. While this makes the cameras more compact, and have greater automatic control, it severely restricts the camera in this area. One of my favorite things to do to increase the cinematic look of video is to use 35mm lenses. While there are adapters which allow you to attach 35mm lenses to some cameras that have permanently attached lenses, the process is less than refined, and not altogether pretty. Besides, you are forced to run the image through more glass, generally, losing light and image quality.
Ironically, the more professional a camera, the more manual the camera becomes. When looking at really high end cameras, there is generally no auto-focus, and all the controls from white balance and iris, to shutter speed are all easily accessible without going into menus. While auto functionality can be handy, cameras aren’t always good at determining what it is you want them to do, or how. For this reason camera operators generally want to be able to have control over these things themselves and want easy access to these functions.
One of the other very sought after options for cinematic looking images is having a film-like frame rate. On video cameras this is 24P, meaning 24 frames per second, progressively scanned. While I won’t get into detail on all the different methods that can be used to handle this, generally, I look for cameras that have a good quality 24p mode, or at least a 25p mode. There are some good post techniques for changing 25p to 24p.
I also look at the image sensor size. Generally, larger is better. Most small cameras have ¼” to 1/3” image sensors, whereas mid-range cameras sometimes have ½” sensors, and most high end cameras have 2/3” sensors. It is generally accepted that the most cinematic sensors are roughly the size of a super 35mm frame and will work with the industry standard 35mm film lenses. But these are only found on very high-end cameras such as the Panavision Genesis, and Red One cameras. The most obvious effect that a larger image sensor has is on the depth of field. Large image sensors create a narrower depth of field, allowing more selective focus.
I also look at the resolution of the image sensor. While a camera may be capable of shooting at 1080p, that doesn’t mean it can actually produce an image with 1920x1080 resolution. Many of these cameras only have an actual resolution of one quarter to one half of that, and use pixel shifting and other technologies to boost resolution, making them resolve the clarity of an image much closer to 720p. Many companies aren’t very forthcoming with this spec though, so this information is often hard to come by.
There are a number of other useful tools found on more professional cameras including, things like adjustable zebra modes, which show overexposures as zebra striped portions of the screen. Underscan, which shows the entire frame. Usually the image stretches slightly beyond the edges of the screen to avoid having black borders on the screen if it is slightly out of adjustment. This is also known as overscan. Underscan shows the entire image, not just what most TVs will see. Some cameras also have assignable buttons that allow the operator to assign commonly used functions to easily accessible buttons. Most of these features are only found on cameras aimed at a more professional crowd, but make operation much easier for the operator.
This article may not be reprinted in print or internet publications without express permission of StudentFilmmakers.com.
| Don't miss another important edition of StudentFilmmakers magazine which focuses on cutting-edge, pre-production, production, post production, and distribution technologies and techniques. Six-month, 1-year, 2-year, and 3-year subscriptions available with discounts from the cover price. Back Issues are also available while copies last. Go to www.studentfilmmakers.com/store >> |
StudentFilmmakers magazine, the #1 Educational Resource for Film and Video Makers, publishes 12 editions per year. Subscribe today and get this important magazine delivered right to your doorstep every month. Each edition contains high level, educational articles for serious filmmakers and videographers like you - articles including cutting edge, real-world practices, trends, and technology, as well as in-depth inspiring interviews with independent filmmakers and experts.
There is something for everyone in each issue, whether you are a director, cinematographer, camera operator, gaffer, editor, producer, sound engineer, animator, composer, actor, screenwriter, ... With today's technology changes coming faster and faster, we are all students.
StudentFilmmakers magazine would like to hear from you!
Click here to share your comments and feedback about the magazine, monthly editions, your favorite articles, and your favorite topics.
We always welcome and appreciate your Reader Comments. View them here, and send yours to the editors today!