HOW-TO, Techniques, & Best Practices Channel
| Tips for Working with Camera Jibs By Staff posted Oct 10, 2009, 17:44 |
Check out this article in the print edition of StudentFilmmakers Magazine, August 2006. Click here to get a copy and to subscribe >>
 Tips for Working with Camera Jibs
by Jon Firestone
| Continued on Next Page> | Page 1 | 2 | 3 |
One of the first things I learned in film school was to dolly not zoom. There is something magical about moving a camera through space and seeing the perspective change during the shot. I�ve spent a lot of time over the last few years finding different ways of moving the camera, but of all the ways the jib is my favorite.
One of my first jibs was an EZ FX Jib, and during this time I landed a job shooting a bunch of apartment complexes. The director wanted nice jib shots. This was my first chance to do a lot of jib setups and to learn what made a jib shot dramatic. I was frustrated that a lot of the shots were unimpressive and would be just as effective with a pan or tilt of the tripod.
The arm on the EZ FX Jib was about six feet long, limiting the kind of shots we could get. Jibs are much more impressive when you are closer to the subject, so that the perspective change is much more dramatic. Also, jibs are great for revealing shots. I started using foreground objects to make the movement more apparent and started using jibs for everything.
In my studio I would leave the jib set up on a dolly and rarely put the camera on sticks even for still shots because the camera could be moved more easily like this. Always trying to come up with new shots I could get with my jib, a few of my favorites include facing the camera 90 degrees off the arm and positioning the camera so that a person or a vehicle could be coming right at the camera and the camera could swing out of the way, catching a profile of the subject, and continue the arc around to watch the back of the subject as it moves away. Just like using a curved dolly track, but with the advantage of not having to keep the track out of the shot, and there is no track for the subject to walk or drive over.
I also use a jib as a problem solving device when doing dolly shots. I can hang the camera straight out over the end of the dolly so that I can make a longer dolly shot without the track becoming visible. Or I will put the track to the side, out of frame, and use the same 90 degree camera trick to fly the camera over trackless ground.
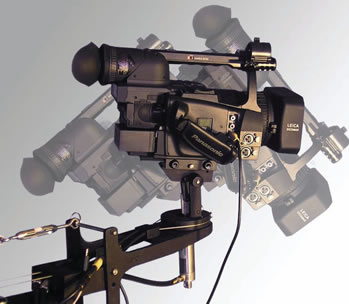
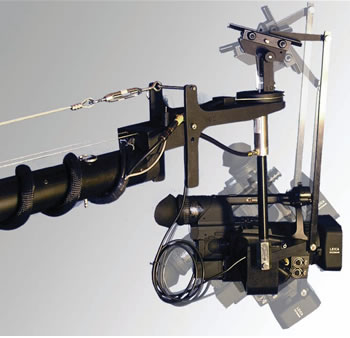
The biggest downside to jibs is their complexity, not only to set up but to get a good shot. The more capable the jib, generally the more complicated the setup is. One trick is to securely mount the jib to a doorway dolly. I only use the dolly to easily move the jib around. For any dolly/jib shots, I will move the dolly onto tracks.
One problem that you have with doing dolly/jib shots is that any movement on the dolly can be amplified by the jib arm. So you have to be careful to keep the arm from wobbling. I like to hold the jib with both hands in different places on the arm to help dampen any unwanted movement.
Since the movement of a jib is considerably different than a tripod, you encounter new problems you don�t have with traditional tripod shots. For example, when working with jibs, I commonly start from near the ground facing up at the subject, then bring the camera to a high angle, now looking down at the subject. Rarely do you ever have this extreme of a tilt on tripod shots, and it must also be done smoothly while concentrating on booming up and panning. The problem that becomes immediately obvious is that traditional tripod heads put the pivot point beneath the camera and nowhere near the center of gravity of the camera. This causes the camera to try to pitch forward or backward at the beginning and end of the tilt, making a smooth tilt difficult.
| Continued on Next Page> | Page 1 | 2 | 3 |