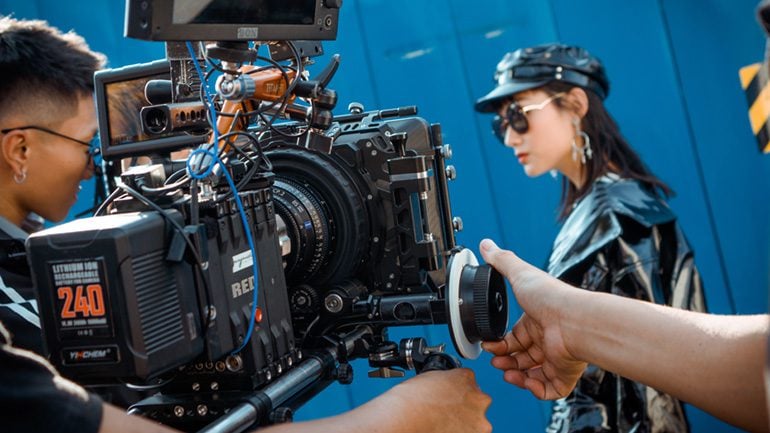
Recordist vs. Sound Mixer
By Fred Ginsburg CAS PhD
Let me begin by asking, “Do you consider yourself a RECORDIST or a SOUND MIXER?”
The difference is akin to being a LINE COOK versus a CHEF DE CUISINE.
A recordist is in charge of recording soundtracks. Bringing a sound into a recorder, setting a proper level, and letting ‘er rip. In the case of multiple audio sources, the recordist sets a level and individually records each audio feed. Every track is recorded individually for optimum quality. There is no concern for comparing relative levels, nor dealing with phasing/overlaps, perspective, and interactions. Get it; set it; forget it.
It is, then, up to post-production (or a live sound mixer further up the recording chain) to continually adjust relative sound levels and to creatively open/close those individual sources to craft a well-balanced soundtrack. Editors (or live mixers) will artistically choose which tracks to listen to and when. Sometimes, they will select only one track at a time, but usually it will be an active blend of some of the tracks (rarely, if ever, all of the tracks) – in order to achieve a consistent and dramatically structured complement to the visual components of the story.
If all that you are planning to do during the shoot is to record the outputs from each of your microphones directly onto blank channels of your camcorder and/or portable audio recorder – then, perhaps you actually do not need a mixing panel. All of the sorting out, volume adjustments (riding gain) between actors, and selection of tracks will be tasks left up to the editors.
However, professional films are not recorded that way! By the time the editors view the dailies and begin their rough edits – they should be working with sound files that are almost cinema ready. Editors want to be able to assemble their first cuts based on visual and story content with relative assurance that the accompanying audio will sound acceptable to their clients. Editors do not want to spend all of their initial time trying to re-mix audio from the dailies in order to sort out what is usable, what is not, and what is worth the time and effort to ADR (aka loop) to make the audio usable.
A sound mixer not only records the audio tracks during the production, but also MIXES (blends) those tracks to produce a cohesive soundtrack that is ready for editing. Yes, at a later stage during post-production, that “production track” will be de-constructed into its individual components, supplemented with additional soundtracks (such as back-up ISO’s, ADR, sound effects, music, et al.), and finely polished for surround sound release. But all of that takes place AFTER the picture is cut.
Which brings us back to the initial question, “Do you need to use a mixing panel on the set?”
When you plug a microphone directly into a camcorder or a small audio recorder, you give up any subtle CONTROL of that microphone. Level controls are coarse and physically tiny on most prosumer recorders, and pretty much inaccessible on most camcorders while you are shooting. If you were able to access the volume control for a mic during a take, even slight adjustments tend to yield overwhelming increases/decreases of volume. Some recorders do not allow you to make adjustments while recording.
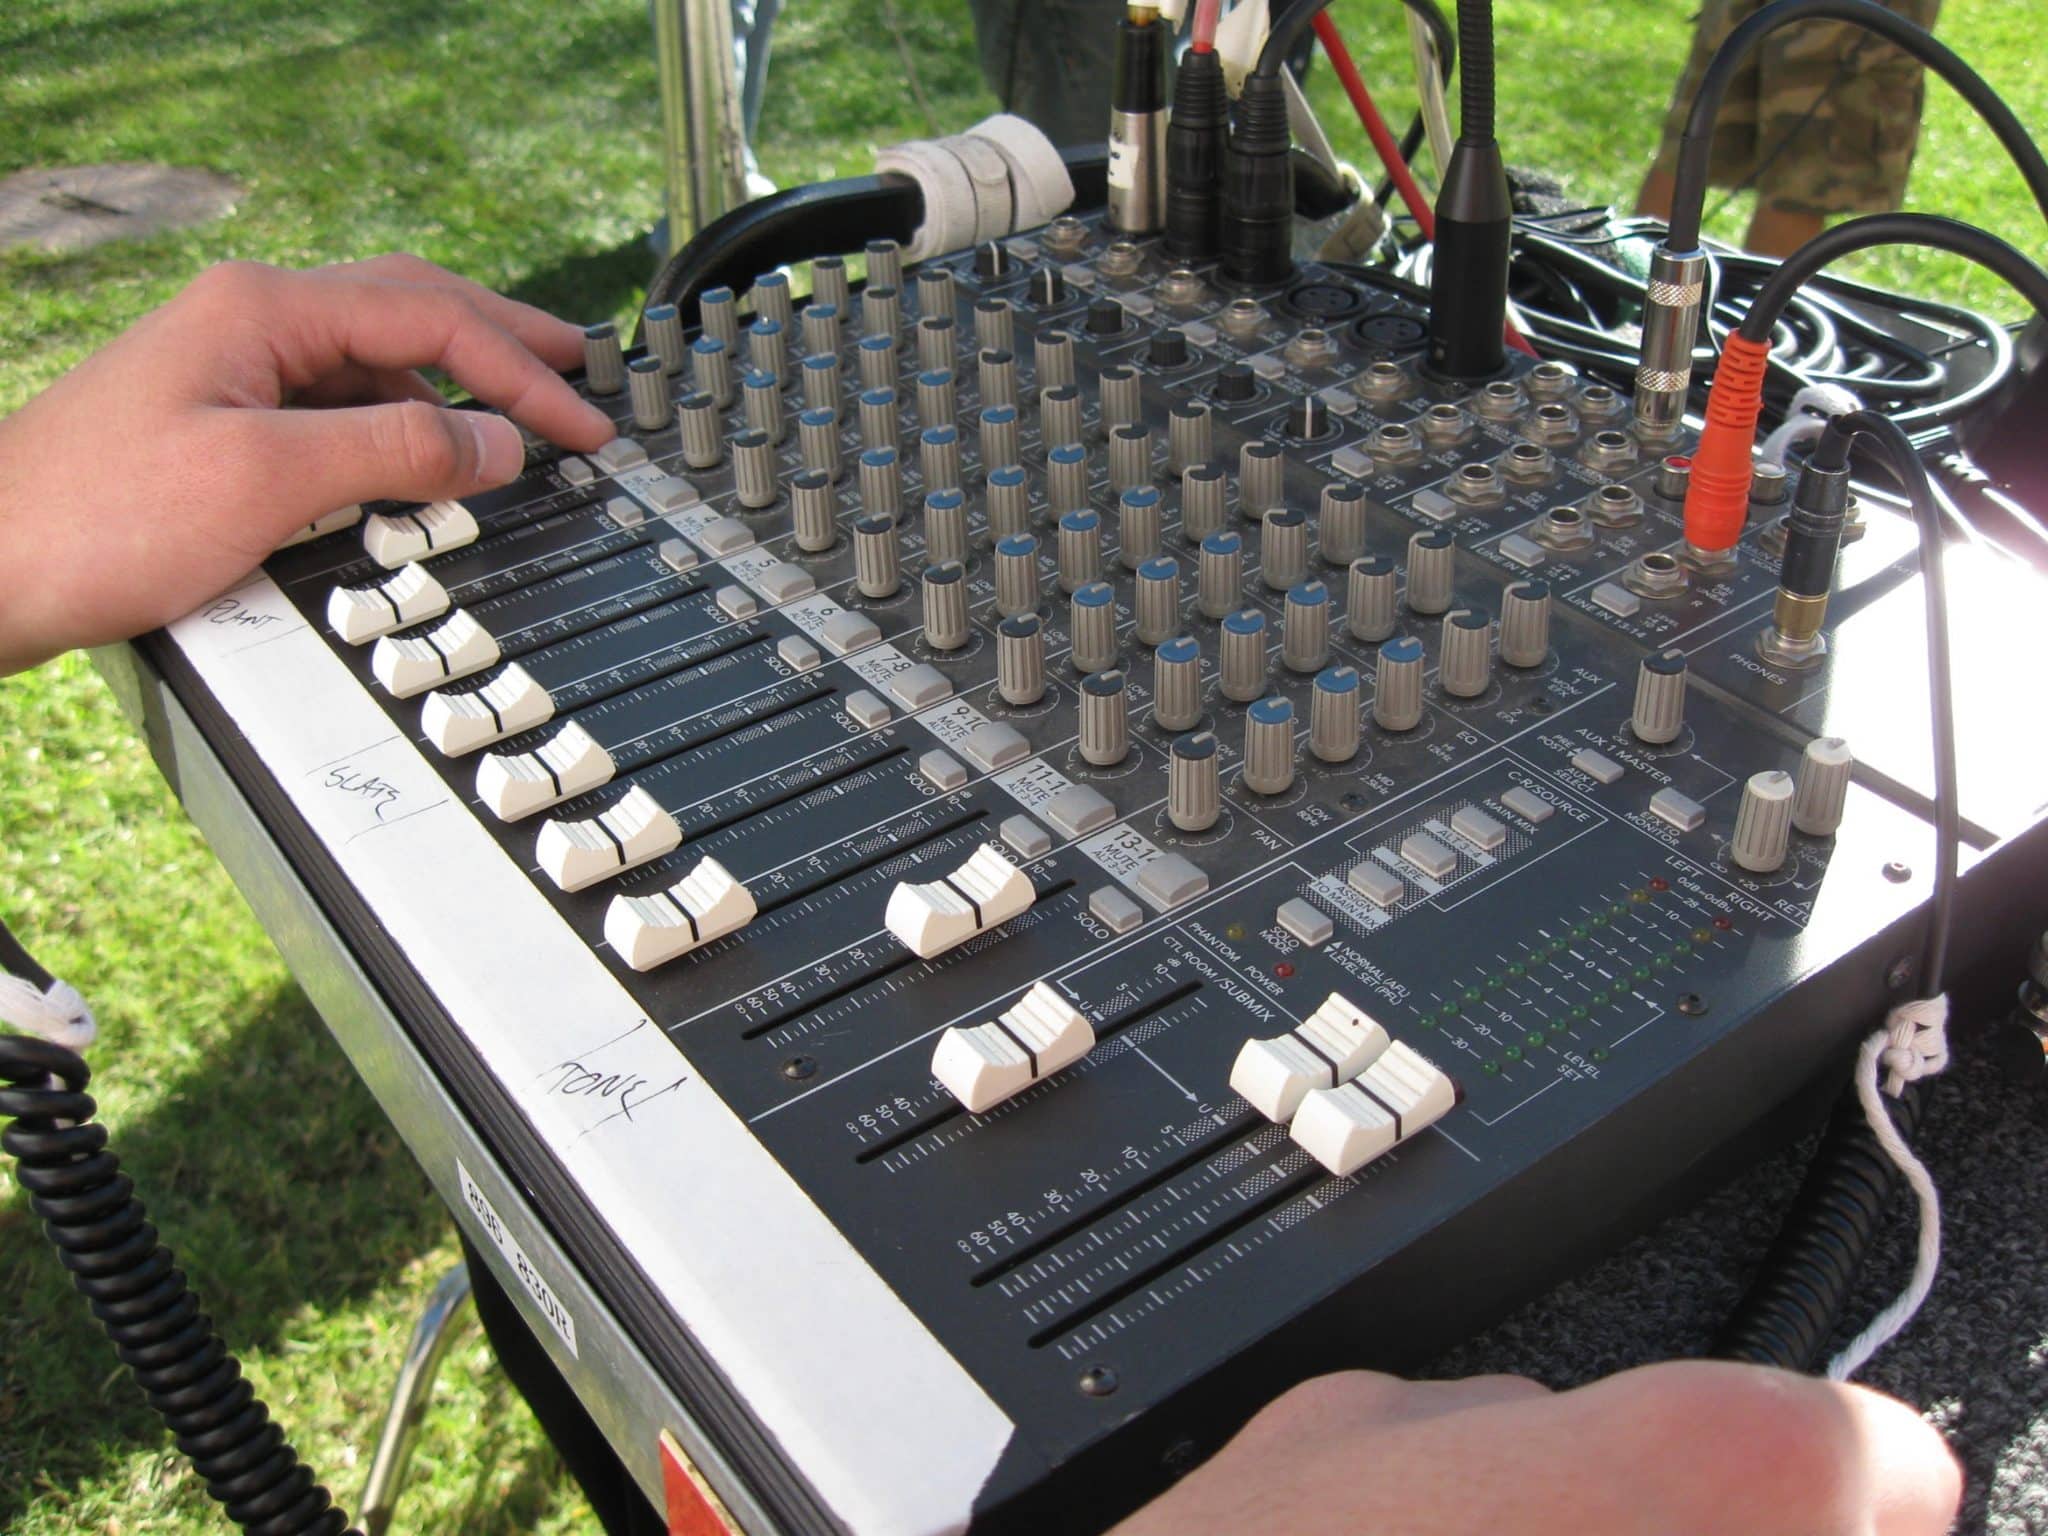
A mixing panel provides the soundperson with remote control of the audio being recorded. Even if you are only using a single microphone, the use of a mixer will allow the soundperson to completely monitor and adjust the levels during the actual take.
There are two primary audio controls on most mixers: the main fader and the trim/gain knob. The (small) trim knobs (we call knobs as potentiometers or pots, by the way) are used to set the course or base level of the audio. The trim, in reality, is a pre-amp that brings mic level up to line level inside of the mixer. We use the trim pots during set-up and rehearsal to get the audio within the ballpark (not too loud but not too soft; somewhere in the middle). We avoid adjusting the trim during a take, since it tends to be a strong adjustment and can often call attention to itself on the soundtrack.
The main fader or slider is a very subtle control of the audio. With it, you can close a mic or fade it open quickly to bring it into play. During the actual performance, you can ride gain to slightly raise/lower the dialogue without the listener being aware.
I always recommend that you set your initial trim while the fader is exactly half-way up the slot. Ignore the (for music) markings along the slider path that indicate Unity (aka neutral) which is usually ¾ up. For film dialogue, it is best to park your faders at the halfway point because that allows you maximum range to slide louder or softer during a performance.
In addition to the mixing panel allowing you to easily and precisely control the volume of each microphone, it also allows you to creatively blend mics together onto individual recording tracks. This is an important feature when you have fewer recording tracks than you do individual microphones.
When you do have more than one mic sharing a track, you need to be careful that the same audio is not picked up by more than one mic at a time, per track. When multiple mics overlap the same audio on the same track, the signals may combine or cancel each other out – what we call phasing interference. You would hear it in the headphones as echo & hollowness. So, if you have mics working in close proximity to each other, such as a boom and a lav on the same actor – try to assign them to separate recording tracks. But if the lav is on an actor who is far from the boom, then you could put them onto the same track.
Very often, we need to fade microphones in and out of the soundtrack in order to prevent phasing and to prevent the dialogue track from becoming too cluttered with background noise. Easy enough to do with a mixing panel, but extremely difficult to do without one.
Another very useful function of mixing panels is the ability to EQUALIZE our microphones. Although the term equalization refers to adjustments of the bass, midrange, and high frequencies – in the case of film production we use the term EQUALIZATION quite literally. Do NOT make the amateur mistake of trying to use the frequency controls to make each microphone sound its best and to reduce background noises. Those corrections will usually result in the dialogue not sounding consistent from take to take, especially when you are shooting non-linear and over multiple days.
Use the equalizer controls (bass, midrange, hi) to make multiple microphones SOUND SIMILAR. It is normal for booms to sound different than lavs and planted (aka hidden) mics. Do not mess around with the EQ of your boom mic; that is the reference sound and anchor for your dialogue tracks. But any additional mics on your set could be frequency adjusted to make them sound closer or similar to what your actor sounds like under the boom.
During set-up, move the boom so that it is over the other mics. Listen to your actor (or a stand-in) under the boom, and then listen to the lav or plant mic. Adjust the volume and EQ of the lav or plant mic so that the resulting audio sounds more similar to the boom (but do NOT adjust the EQ of the boom itself).
So, the boom operator can hear!
Another very useful function of mixing panels is so that your boom operator can hear. It is important for the boom person to not only hear their boom mic, but to be able to hear the entire soundtrack as it is mixed on the set. Most of the time, we use more than one microphone at a time. On large shows, it is commonplace to run two booms, a couple planted mics, and god knows how many radio mics.
If the boom person cannot hear their own mic, then they have no idea what is being picked up. If they only hear their own boom mic, then they assume that everything on the soundtrack is dependent on that one mic and will aim it wildly across the set hoping to hear every sound! But if the boom operator is able to hear the other mics in play, as they are faded in/out – then they can be confident that they only need to concentrate on their assigned “boom” zone and not to worry about hard to reach sounds deeper in the set.
You can use a Y-cable to allow the boom operator to share the headphone feed of your mixing panel. Some mixing boards offer a dedicated COMS output specifically for the boom op. Personally, I like to use the AUX output for my booms, so that I can customize their listening levels and select which mics are feeding their headphones. No need for them to hear TONE, or sound effects mics.
Making the most of your available record tracks
The mixing panel not only gives you total control over each input, but it allows you to control your outputs.
If your camcorder or audio recorder only has two available record channels (mistakenly labeled as Left/Right, rather than as One/Two) – I would route the main output of the mixer to these channels.
You have a couple of options: discreet two track, dual mono, or dual attenuated mono.
Discreet two track means that you will send a Left/Right mixed track from your panel to the recorder. The sounds (or mics) on the Left channel will be different than those sent to the Right channel. This is to avoid phasing interference or to give the editor a little choice. It means that the Editor will have to do some minor sound mixing when they work with the dailies.
Dual mono just means that the same exact track content is being sent to both the Left and Right record channels. They are identical in content and volume. If you only sent audio to the Left side, then the Right side would be just blank static in the headphones or during playback.
Dual attenuated mono is similar to dual mono, except that we purposely record the audio for the Right channel 10 or 15 dB lower than the audio on the Left. This covers us in case of an unexpected shout or loud sound that would otherwise be distorted. During editing, they would only use the Left production track (but treated as a centered mono track on the timeline) for most of the rough cut. If the editor encounters a distorted section of the performance, then it is a simple task to mute that portion of the Left track and utilize the (attenuated) audio on the Right track (which is now a centered mono track on the timeline, underneath the “normal” track). Smiley face on the Editor!
When we have four (or more) recording tracks available to us, we can still provide dual attenuated mono on tracks one and two for the convenience of the editor – as well as providing two or more discreet tracks of additional audio. Usually these additional tracks are what we refer to as ISO’s.
An ISO is an audio track that is the direct, raw feed from one individual mic (or a couple selected mics that do not interfere with each other). Your ISO track should be un-mixed and fed directly from the trim or gain output. It should exit the mixing panel BEFORE it is controlled by the main fader, so that if the sound mixer makes an error in opening/closing a specific mic, the ISO track remains unaffected. We refer to that as a “pre-fader direct output”.
Most of the professional (albeit inexpensive) mixing panels such as Mackie and Behringer do offer some form of pre-fader direct outs, but novices should seek the advice of experts to learn the secret workarounds of getting pre-fader direct outs from the entry level models.
Have your cake and eat it, too
What we do in Hollywood is to provide a dual attenuated mono LIVE MIX to the editor for use in the rough cut, along with several ISO tracks of our most important mics for the sound editors to access later on, during the sound editing phase if they need to re-construct or modify the finished scenes. ISO tracks would include the boom, second boom, planted mics, and radio mics worn by the key actors.
These ISO tracks are RECORDED, but not MIXED or adjusted during production. Like a recordist, we just set them, forget them, and record them. Not too loud, not too soft. No EQ corrections. Just raw feeds, ready to be painstakingly re-constructed if the need arises. Producers take note: it can be done, but it is time consuming and expensive, so try to use the Production Mix as much as possible and only use the ISO’s when it is a last resort.
Summary
Mixing panels provide the soundperson lots of control over the quality of the audio being recorded, whether it be from a single mic or a complex, Hollywood style set-up.
Mixers allow us to control the volume of each mic smoothly. We can also equalize mics so that they sound similar as we fade them in and out.
We can provide an important headphone feed to our boom operator, as well as selected audio to other key personnel on the set such as the Director, Scriptie, or Client.
Multiple microphones can be assigned or live mixed to different recording tracks. In some instances, it is possible to record raw feeds from each mic onto ISO tracks in addition to an attenuated dual mono Production track.
Mixing panels are relatively inexpensive. Models from Mackie are under $400; and models with similar features from Behringer are under $200. But make sure that your mixer has XLR microphone level inputs, and convenient slider/fader controls on the inputs. Rotary controls limit your ability to simultaneously adjust more than two inputs at a time unless you have the finger dexterity of a magician.