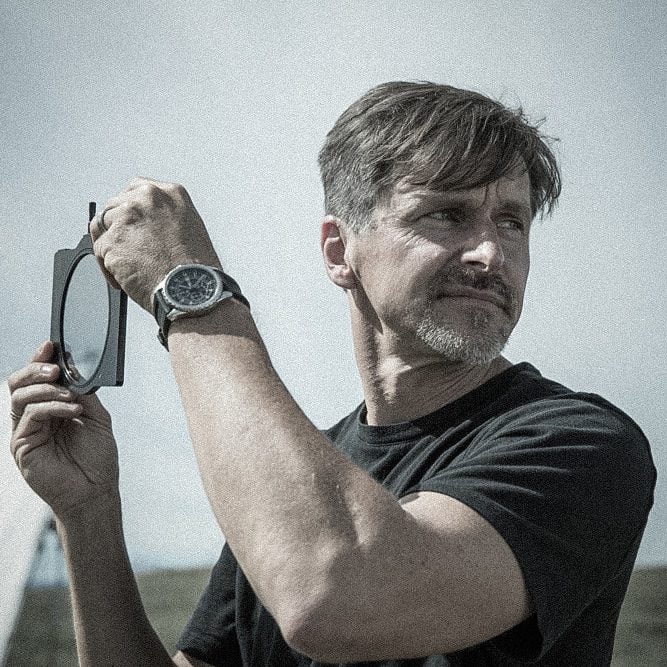
A Conversation with Craig Wrobleski csc
Lighting Dark Scenes and Creating Characters, Ambiances and Emotion with Light
Exclusive interview conducted by Jody Michelle Solis
In more than 30 years behind the camera, Craig Wrobleski csc has had the opportunity to photograph projects of most every description. After getting his start as a cinematographer shooting documentaries, sports and corporate films, Craig transitioned into music video and commercial work before taking on Second Unit Director of Photography duties on features and television movies. The next step in his evolution was to take on the main unit Directory of Photography role on feature films, TV movies and, most recently, television series.
Craig’s credits include two seasons of the acclaimed FX series, “Fargo”, Season One of “Legion for FX”, the 10-part event series of “The X-Files”, “The Twilight Zone” limited series,two seasons of the hit Netflix series, “Umbrella Academy”, and an episode of the groundbreaking Amazon series, “Tales from the Loop”. His feature film credits include “The Unholy” for Sony/Screen Gems and “In the Tall Grass” for Netflix – based on a Stephen King short story.
Craig is the recipient of two CSC Awards in addition to his 16 Alberta Film and Television Award wins. He has also been nominated six times at the CSC Awards and his “Blurryman” episode of “Twilight Zone” received an ASC Award nomination in 2020.
Your work on “The Twilight Zone,” Season 1, Episode 10, “Blurryman,” starring Zazie Beetz, Seth Rogen, and Betty Gabriel, was nominated in 2020 for an ASC Award in Outstanding Achievement in Cinematography. Can you tell us about the lighting for this episode, and how you used visual storytelling techniques to explore the characters, create mood, and build emotion into scenes? What are some examples?
Craig Wrobleski csc: The lighting and camerawork for “Blurryman” was intended to follow the same trajectory as Zazie’s character, Sophie’s, descent into paranoia, confusion and apparent insanity. Early in the episode, we wanted to create as natural an environment as possible, and we had a great time creating the backstage world of a film set with all of its random light sources and organized chaos. As Sophie’s world starts to shift under her feet, the lighting and camerawork shift into a more surreal and heightened feel as she travels through this strange new world – the lighting becomes more expressionistic and the camerawork shifts from an objective perspective to a combination of subjective and objective lensing.
We wanted to create the feeling that the familiar environments around her were becoming a horror movie that she was being forced to live in. She is in constant motion throughout the episode, and we enjoyed creating these increasingly strange spaces for her journey.
Camera movement was another powerful tool we used with the handheld camera switching gears from a documentary style to becoming more frenetic – echoing Sophie’s mindset as she is pursued by the Blurryman.
We also decided that the Blurryman could control the light sources around him as another way to unnerve Sophie, and we enjoyed creating the light cues you see throughout the episode.
All of the techniques mentioned above culminated in the episode shifting to black and white in one shot that rotates around Sophie as the set empties out and transforms while the colour slowly bleeds out of the image until it is just a monochrome image. The set transformation was all done practically through a motorized set wall that could be dropped in to close off the set, actors scattering off-set on cue and an army of off-camera crew clearing and re-dressing the set just in time for the rotating camera to bring it back into view. Bleeding the colour out of the image was accomplished by our brilliant colourist, Pankaj Bajpai, who did so slowly and selectively, colour by colour, until the last remaining colour was red which then also disappeared.
The Blurryman was an element we wanted to be practical as much as possible so we could keep him feeling real as a presence and not relying overly on visual effects. To this end, we dressed the Blurryman in a black velvet suit so he absorbed as much light as possible so that he seemed to be defying the laws of physics as he moved through set – remaining a mystery to Sophie and the audience. We would have loved to have made his suit out of Vantablack but that proved a bit too costly. VFX stepped in when necessary to blur out the Blurryman, and we had many discussions about that effect not feeling like an electronic effect but more like an optical effect echoing how objects appear when out of focus.
“In the Tall Grass” was nominated in 2020 for a CSC Award in the non-theatrical feature cinematography category. Can you talk a little bit about lighting for mood, and how you created different characters and ambiances with light for particular scenes? How did you light the characters and scenes?
Craig Wrobleski csc: “In the Tall Grass” was challenging in that we shot the field as a real environment and were at the mercy of weather and natural light for the day scenes. Luckily, both cooperated, and we had a very successful shoot outdoors. Being able to move that camera through the narrow passageways made the field feel alive and oppressive – surrounding and sometimes overwhelming our characters. We shot on the Alexa LF camera and the wider field of view provided by the larger sensor, along with the 2.39 aspect ratio, played an important role in capturing the immersive quality we were looking for.
To add to the sense of disorientation, we planned and staged most of the exterior portion of the film to play in backlight so the viewer was never aware of direction – in tune with the sense of being lost that the characters were experiencing. We wanted to feel there was a timeless quality to what was happening in the field, with day sliding into night and back into day again without any real sense of what time it is.
For the night scenes, we shot the grass field on a soundstage but essentially transplanted a portion of the field into the studio. This gave us more control over the lighting and took weather and bugs out of the mix, somewhat reducing the already substantial discomfort the cast and crew were experiencing on this very tough shoot.
The moonlight look for the night scenes had a heightened quality – much like what a full moon feels like when your eyes have adjusted and there is no other light source around. The grass environment was very difficult to light but our lighting and grip team created ingenious solutions to put beautiful soft moonlight into the environment. I live in the country and sent our director, Vincenzo Natali, an iPhone image of a full moon night that was bright enough to be captured by an iPhone and that became one of the jumping off points for our conversations about the night look.
I loved the way the blades of grass reflected large soft light sources and we test many LUT, light source and gel combinations until we found the one that felt right. Our fantastic gaffer, Bob Davidson, suggested we shoot gelled tungsten light for our moonlight and he was so right. The beautiful quality of the tungsten light combined with our gel, LUT and filter combination created a pearlescent quality to the moonlight that I had been seeking for years. The sweat treatment the make-up team applied to the characters also reflected our moonlight beautifully. As with the day scenes, we wanted the moonlight to add to the sense of disorientation, and we worked hard to create pockets of darkness while still lighting in such a way that accentuated the depth and layers of the field. The director, Vincenzo and I had many discussions about darkness and exactly, “How dark is dark?” He was adamant that we create mood but never wanted the darkness to obscure the story unless that was our intent. Much of the film takes place at night, and we had to be constantly vigilant that the look wasn’t getting in the way of the storytelling.
How do you light dark scenes as it pertains to creating and filming dark, horror film style ambiances? What are ways to light a scene so that it feels dark? Can you give some examples?
Craig Wrobleski csc: The question, “How dark is dark?” is one of the most common questions when projects are being prepped and also one of the most difficult to answer. The best way to answer the question is to test looks and treatments to create a common language everyone can understand that explains how dark the dark will be. Digital cameras are certainly liberating in the pursuit of creating darkness in that the “what you see is what you get” aspect of the medium allows us to push boundaries, and everyone with a properly calibrated monitor can get a sense of what the final image will look like.
It is important when creating darkness that you are also protecting your digital negative so that when you get into the grading suite you have a robust image that, while dark, still has enough information in the lower end of the curve to keep your shadows clean and free of digital noise. One technique is to shoot at a lower ISO than you normally would [for example, 400 instead of 800] to feed the sensor while still retaining the look you desire on the monitor. Your waveform monitor, false colour and histogram information can help guide you to ensure you are protecting your negative. This was a technique our DIT on “In the Tall Grass”, Gautam Pinto, used to create effects to deliver a pristine negative to Deluxe that made the final grade significantly easier. One side effect of shooting on a lower ISO is that the set can feel substantially brighter than one might feel it should be, but that concern can generally be put to rest by sharing the monitor images to explain how the image is being processed to create the desired effect.
Once those technical realties are put into place, the lighting itself largely revolves around the classic horror film lighting techniques of concealing certain elements and revealing others using light and shadow. Horror film lighting opens up many techniques and styles that might seem out of place in other genres of filmmaking. It frees you up to be very expressionistic and bold in your choices. It is a lot of fun. “The Unholy” is an example of a film that afforded us opportunities to make unconventional choices when we wanted the narrative to shift into the supernatural.
What are your Top 3 Lighting Tips for students and new filmmakers?
Craig Wrobleski csc: That’s a good question. It’s difficult to narrow it down to three, but here we go.
#1. Consider all the tools at your disposal. Filmmaking is a diverse and infinite art form, and there are many choices to be made when putting a film together. It is important to consider all the options and experiment with new tools and techniques to find the right ones for the project. There is a risk of doing “that thing you do” and having the work all start to look the same. Bringing fresh eyes to every project and finding the best way to tell the story is so important. That applies to the choice of lighting instruments, cameras, lenses, filters, gels, dollies, gimbals, cranes and every other aspect of image creation. And remember – what you choose not to do is as important as what you choose to do.
#2. Be aware of the seduction of beauty. The technical quality of the tools we are able to use these days make it comparatively easy to create beautiful images. The risk is that the images are beautiful but have no soul. There is nothing sublime beneath the beauty. I see a lot of photography that is beautiful, moody and dramatic but doesn’t fulfill its purpose of serving the story. The camera is such a powerful instrument and when any specific technique is used all the time, it loses some of its power as a storytelling tool. Sometimes images need to be bright, sometimes they need to be dark, sometimes they need to be imperfect and rough, sometimes they need to be smooth and sleek , sometimes they need to be “ugly” and, yes, sometimes they need to be beautiful. I see a trend toward cinematography that is more photographic than cinematic – shallow depth of field, portrait style soft lighting, etc. I fear the art and possibilities of lighting is being lost in the pursuit of beautiful, dramatic, eye-catching images. Learn how to use the tools of lighting and how infinitely flexible those tools are to create myriad looks that can tell your story.
#3. Find your own voice. When you are starting out, mentors and influences are invaluable, but those resources should only be used to assist you in finding your own voice as a storyteller. If you only seek to emulate others’ work, you will be an impersonator, and the work will never have the personal touch that the audience will feel and respond to. Shooting is the only way to find your voice – putting your ego aside, sticking your neck out, making mistakes and learning from them. It is a process that will last your entire career. This is not a job we get good at, we just get better. Putting all of yourself and who you are into your work enables you to work from a place of instinct and heart and is one of the most fulfilling aspects of the job, in my experience.![]()
![]()
Interview conducted by Jody Michelle Solis. Associate Publisher for StudentFilmmakers Magazine (www.studentfilmmakers.com), HD Pro Guide Magazine (www.hdproguide.com), and Sports Video Tech (www.sportsvideotech.com) Magazine.
“With the rapid application of the changing technologies, we are all students.”